Pages

Wednesday, March 19, 2014

It's Scurvy Season!


Do not be afraid!  There's a cure for that.  Pirates at the Natural History Museum.


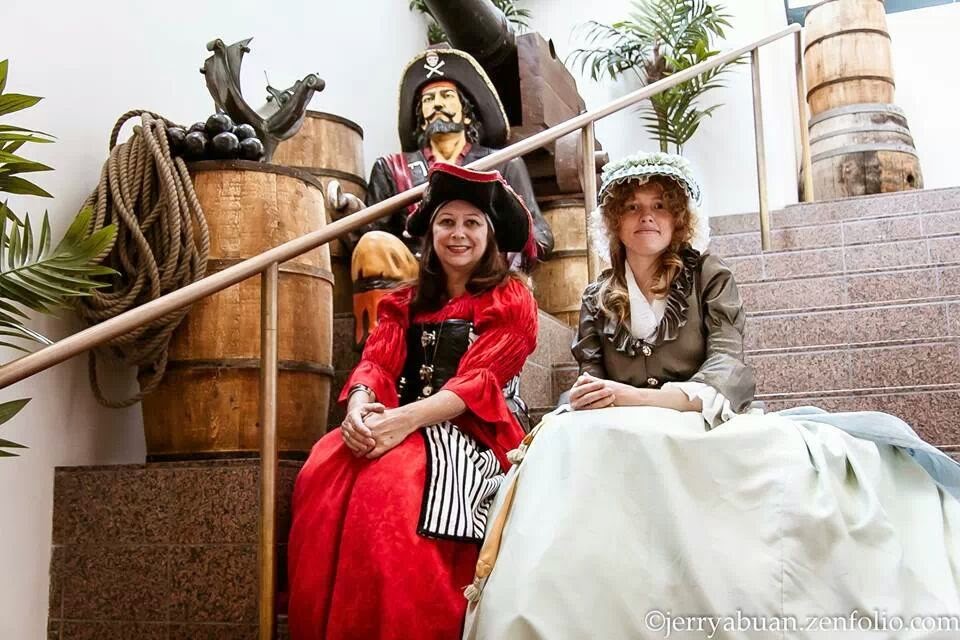
My very first official costumed outing with the San Diego Costume Guild.  It was a most wonderful time.  Everyone in their 18th century pirate finery.  We toured the exhibit, which was very well presented, then enjoyed a lunch on the lawn.  With warm weather and good food, we shared our experiences in costuming.  Great fun indeed.


The museum set the stage very well.  These awesome hanging pirates were in several places inside and on the building outside.  I did a double take when I saw the first one on the building exterior. 


Some of you were asking about my hat & cap.  There are a few photos here of how I put the hat & cap together for you to see.  All but two steps were hand sewn, for the hat & for the cap, it
was completely hand sewn.  When I started my research I came across an article that said if any part of your historic costume was worthy of hand sewing it was your cap, which is surrounding your face, which is the first thing people look at when they meet you.  Sound advice which I took and as your compliments and questions can attest, it was well worth the extra time. 


The basic structure of the hat was constructed from very thick fusible interfacing that I had left over.  I cut a small circle and a 1inch wide by 15 inches long or so.  I whip stitched the two together to make the center rise of the hat.  Then I put it down on a larger piece to trace the shape for the center hole.  Then I decided on how big around I wanted it and cut out the brim of the hat.  The next step was to cover my two parts in fabric. The brim was a long rectangle two times the width of the brim plus an inch.  Then it was wrapped around from the outside to the inside, pinned into place to created nice even gather lines.  I did a regular running stitch to hand tack it along the edge.  Then I covered the outside of the center cap, tacking it into place and whip stitching it to the brim.  After that I made my pleated ribbon strand.  Then took the two long strips of already pinked fabric, stitched them together on the sewing machine with a long stitch and tight tension, which gathered as it stitched, to make the ruffle for the top.  The pleated ribbon was pinned in place and a green ribbon was sewn on the machine around the edge to anchor both parts of the rim.  The ruffle was pinned on and hand tacked.  The ribbon underneath for tying the hat on was pinned at the joint where the center cap was whipped to the brim, laid out toward the outside of the brim.  It was sewn in with the rim ribbons and the pinned spots were covered when I finished the underside with a piece of fabric.  Sorry there is no photo for the underside.  But I'm sure you'll be able to handle that part.  The inspiration for the cap & hat are here for you to see.


The cap was hand sewn completely.  The brim wasn't pleated in the photo of the final product here, but I put it here for you to see the difference as both options are possible and the ruffled look might compliment your face better.  The pleated piece was just a long rectangular piece, hemmed all the way around.  The cap & joining piece were from Simplicity Pattern 2354.  I used pattern A even though pattern D is a cap, I liked the brim shape of A to match the inspiration pics.  All pieces were hemmed, then pinned to the corresponding part, pleated where it was needed and then everything was whipped stitched together by hand.  It created this lovely edging detail.  The last step is the pocket for your tie at the back.  Press your fabric to hem, whip stitch to created a pocket, cut twill tape to a decent length (or what pattern calls for) and draw it through.  You can tack it in the center so you don't risk pulling it out, but if you are careful you don't need to do that step.


Photos provided by friends, myself and Jerry Abuan; jerryabuan.zenfolio.com.

Monday, February 24, 2014

A Retreat

Besides having retreated once again from logging my projects diligently, I've not been idle.  There are so many wonderful posts coming soon.  I've heard just this weekend that the life of a Christian should be an endeavor for diligence so that you might finish well.  This has motivated me to strive for diligence everywhere.  Not just in having a house & yard well kept, but in paperwork & goal setting.  This has prompted me to pull out the blogging plan I printed out from:

http://www.confessionsofahomeschooler.com/planners


It was printed at the end of last year and bound in a nice new binder, then stuck on the shelf.  I've dragged it back out and intend to set up a few posts to log what has been done and to plan the next ones before the projects are even ready to be blogged.

As for this week there will be a lot of running around to get ready for the Women's Retreat for my church.  I'm playing bass and I've been looking forward to this since the day I was asked in January.  It is such an honor to be able to team up with such wonderful servants of the King.  Then there is the retreat which is amazingly refreshing.  I should be able to come back to you next week all revved up and ready to rock, I mean blog.

I pray you have a great week and keep an eye out for what's to come.


Wednesday, January 1, 2014

Fresh Beginnings - Happy New Year!

First post of the New Year!  It's so exciting to start sharing with you right away in this new season.  Soon it will be spring, but until then it's a focus on fresh starts and new plans.  New year's resolutions abound and we strive and hope to make a difference.  Well this new year, for me, brings a bug with it.  No I didn't catch "the bug" that's going around.  It's a cleaning bug!  I'm going to get a big jump on "spring cleaning" and I'm already off and running.

For about a week now I've been cleaning like crazy.  Crazy cleaning means that I'm not just wiping down counters for germs and dusting the spots I've not touched in a long time.  This is the deep cleaning with a parental supervisor named organization.  With my office, it started with a pile of paperwork, one I haven't touched in months, and it turned into every single pile. Even the year old pile got my thorough attention.  Every shelf was sorted for one major factor, HAS IT BEEN USED in the last year.  If not, it got chucked!  Old phone books, folders that I was "saving", even though they were so ripped and written all over that I'm not sure how I thought I'd be able to save them, and all the old, irrelevant, to-do lists that make up half or more of the piles I had to sort.  There was also a great purging of all NON-Essentials.  Any hair ties, bobby pins, hats, sunglasses, shoes, jewelry, extra headphones, painting supplies (don't they belong in the garage?), half of the purses that never seem to make it back to the "I'm not using it right now" bag pile (which I'm going to probably cover when we do a sewing room make-over) and so much more.  It feels so wonderful as I sit here now with my morning coffee, in my clean, organized office!

The other project that I've started on is linked to one of my Christmas presents.  I received a mortar & pestle!  It was a last minute addition to my "wish list" and I'm so glad I didn't add it too late.  It's been on my home-maker list for a long time to harvest, dry & store all the extra herbs I don't use fresh from the garden.  But after getting this wonderful gift that I'd asked for, I realized that I didn't have any spice jars to store them in.  My memory & a recent project served me well to remind me of the many baby food jars a friend gave me.  They were for a project for my mother in law to hang jars from the bottom of shelves, (screwing the lid to the underside) so that from a wheelchair she could see them and reach them to get to smaller items that were getting lost in drawers. 

Jars were no longer an issue as I had about 15 left.  I picked out the best 10 and the following photos are of the project that quickly ensued.


Prior to receiving this wonderful gift, I had cleaned & laid out oregano trimmings for drying.  They dried well and were ready to go as soon as I brought this gift home from my Mom's.  A few days later and I unpacked it, cleaned it & used it to grind down my whole leaves.  The result was perfect!
Baby food jars, ready to be painted.
I had left over chalk board paint from a recent project for my church, so that meant I didn't have to go to the store.  Praise God for small miracles.  You know how it is when you really just want to do your project now!  Going to the store would take all the project steam to accomplish and there would be nothing left to craft with upon returning home.  After pulling out the quart of paint and giving it a good stir, I prepped my jars for painting.  Blue painter's tape works the best.  I just followed the little glue lines left behind from the labels, because they were pretty evenly spaced for all of the jars.  Then I set myself to painting them.

Voila!
The completed project, fresh oregano and all.  Now I just have to dry & grind more & different types of herbs.


So that's my start to my Fresh Beginnings series, which I plan to lay out as we move through the first few months of this year.  I'll be covering the upcoming move (more details later), the dreaded hall closet, a painted "face-lift" for the house interior, and much more!

Thanks for joining me on this fine New Year's morning!!!  I'll see you again soon for many projects to come!


                        *****  Coming Soon!  *****  A NEW LOOK for this page!


Friday, December 27, 2013

I'm Back!!!


My most humble apologies for the lack of activity since August! Really?  August? Yeah, it's been that long.  Too long, much, much too long.  Well it's time to kick this thing back into gear.  Maybe not high gear, but we can get the ball rolling, right?

To start with here's recap, Summer was a whirlwind of activity, which should have meant a lot of posting, hmm.

I attended a "walk about" for the Steampunk community.


Then there was Summer Feast with my Corthan SCA friends.


My birthday was in there somewhere.

Then, in the beginning of Fall, I designed and sewed a family costume set with a good friend of mine, Nichol Richardson.  What an amazing time that was.  Maybe I'll recap it in it's own post, sometime in the future.  We hope to have a nice photography session to capture what I think is the natural beauty of this family in all their humorous and quirky glory.  They made me smile this fall and for that I'm eternally grateful!


After a big sigh of completion immediately following Halloween, then the Winter crop had to go in in the garden and it is doing splendidly.  We've already enjoyed some broccoli, basil, rosemary, lettuce & soon we will be enjoying snap peas, CARROTS (my favorite garden veggie), artichokes (maybe), and more broccoli.


Winter festivities also started.

Sewing for the San Diego Costume Guild's Christmas Dinner.


Christmas designing & decorating at my church.  The 16' lobby tree got a makeover this year.  A big shout out, thank you, to all of our decorating geniuses, who helped us put out all the decorations!!!


A trip to Disneyland with my Mom!!!  This was such a wonderful adventure.  We went, along with a few friends, to enjoy the original park.  This is the first of hopefully a year long set of trips.  There will be more photos to come in future posts to document our adventures.


And finally, a blast wave of youth clothing, right before Christmas.  Hemming pants, baby skirts, a hoodie scarf with bear ears, and much more to come.  I'm gearing my sewing time towards making money this year.  I'm hoping to support my year pass to Disneyland habit and maybe help with our personal finances.  So far it's been amazing to be blessed by the orders I've received.  I'll keep you posted about the progress and the best of the projects in the months to come.


Thanks for taking this end of year, all in one post, tour with me!  See you again soon!


Sunday, August 4, 2013

Summer's Here!

For the past few weeks posting has been almost non-existent and that means one of two things, creative block, or no free time.  For me, this time, it's been a combination of both of those things.  When I had the time, there was a block in my creative side.  The inspiration for my summer costume projects came and went of its own accord and I wasn't able to force it back. 

The steampunk event went without a hitch.  Although it took 3 hours to get dressed and do my hair.  But the result was worth the time.  Steam World's Fair on Adam's Avenue was a fun get together with some friends who helped me dive in to my first steamy event.  They made the night great and I'm forever hooked.  There were vendors, live music & performances, many in costume and some not.  There was an endless stream of photo moment requests from other attendees and passer by alike.  The feel of the event was relaxed and comfortable.


So now that it's all wrapped up and the event has passed, the costume is pressed and hung away for another day.  By all rights I should have been pumped and ready for the next event.  Summer Feast, with my Cortha friends.  It is an Ottoman Summer Retreat and the scope for costume is wide and pliable.  My favorite type.  So open to the creation process to make something unique or clever.  Inspiration was instant but my budget didn't cooperate and so the idea had to sit and wait for the funds to buy the parts & yardage.  But the days came and the materials were acquired.  Then I lost the juice, the drive.  It just vanished and no matter what I did to try to jump start the creativity, it just dragged along threatening to burn out, like an ancient snail not wanting to give in to death.

This weekend though I determined to tackle part of it to fulfill my promise of revealing the fabric choice as a finished garment.  Here it is folks.  With your help to choose the best lining fabric for this bustle piece, I was able to create this.  The royal and rich feel of the purple fabric with gold filigree design won me over as it did for a few of you as well.  Thank you for your help, it turned out beautiful!


Then I was off and running and the pants came together too.  I had the drive to complete the pants so that my photo would be complete to show you the full elegance of the bustle fabric choices.

All that is left now is to make the bodice.  It is all cut and I've started making channels for boning on all the parts that need it.  I hope to have the whole thing complete before Friday night's Sewing group which is the day before the Retreat!

Final pics will come with the next post, so keep an eye out!